When building Sprite – Fractured Shards all focus went into making a working rendering pipeline whilst simultaneously learning to build game systems using ECS. The Eggine engine was very unstable and was missing a lot of functionality since it was in such an early state. So after finishing spite we did an overhaul to fix up some of the bottlenecks that made the engine a pain to work in for programmers. To begin I decided to build a UI tool for our artists. Almost exactly after finishing the first version of the UI Builder another problem was brought to the surface. Adding materials was inconvenient.
Building a 3D rendering engine from scratch alongside a graphics programming course, while also trying to juggle a game being developed in that engine made a lot of features rushed. Because the course was meant to be held in parallel many of the implementations were very barebone. The goal was just to bring a model from file to render on the screen. Since it worked we did not rework much of the structure until much later. After all we had a game to build!
After a lot of feedback back and forth and using the system for a while I finally settled on a version that is now present in Blomstertid, our final game project. When the editor is opened all it looks for all files with the fbx file ending and looks if it has a meta file. If not it is generated and filled with the null texture and default shader and properties. The model is then added to a To-Do list of sorts which can easily be accessed when opening the meta editor. This way we can easily make sure that all models have their correct textures.
When the game is running these files are read on load so that all models have their correct textures and VFX. It also gives power to our artists as they can test more of their work on their own.
This resulted in a pipeline that did not scale very well. Every model had to have its textures in a folder next to it and we did not support multiple materials for a single model. This was brought up as a concern by our artists when we started building School Raider. Their workflow was not ideal, multiple copies of materials meant a bigger repository and possible outdated textures. Together me and the artists set up a goal. Eggine needed support for models with multiple materials that on their own are not directly connected to specific models.
Like all problems I started off by researching. I had a loose plan of what I could do to solve the problem, but there were still some question marks. How did our asset import library handle models with multiple materials? These things are usually like detective work. After asking the artists I had a picture of how things worked in the model. They design an object, select faces and apply a material to those faces. This sounded really scary. I couldn’t really picture how a shader would scale if there needed to different materials on different faces if they were all the same model.
After further research into our asset import library and stepping through some code I understood that this was not the complete picture. These face selections with materials are indeed not that scary. Models are simply divided into multiple meshes. Dividing the model into meshes turned out to be a simple operation.
I then had to make some changes to assigning models to a game objects. Our render command loop now had to send commands for each mesh in a model. These commands brought their own materials listen in the model component.
Code Review
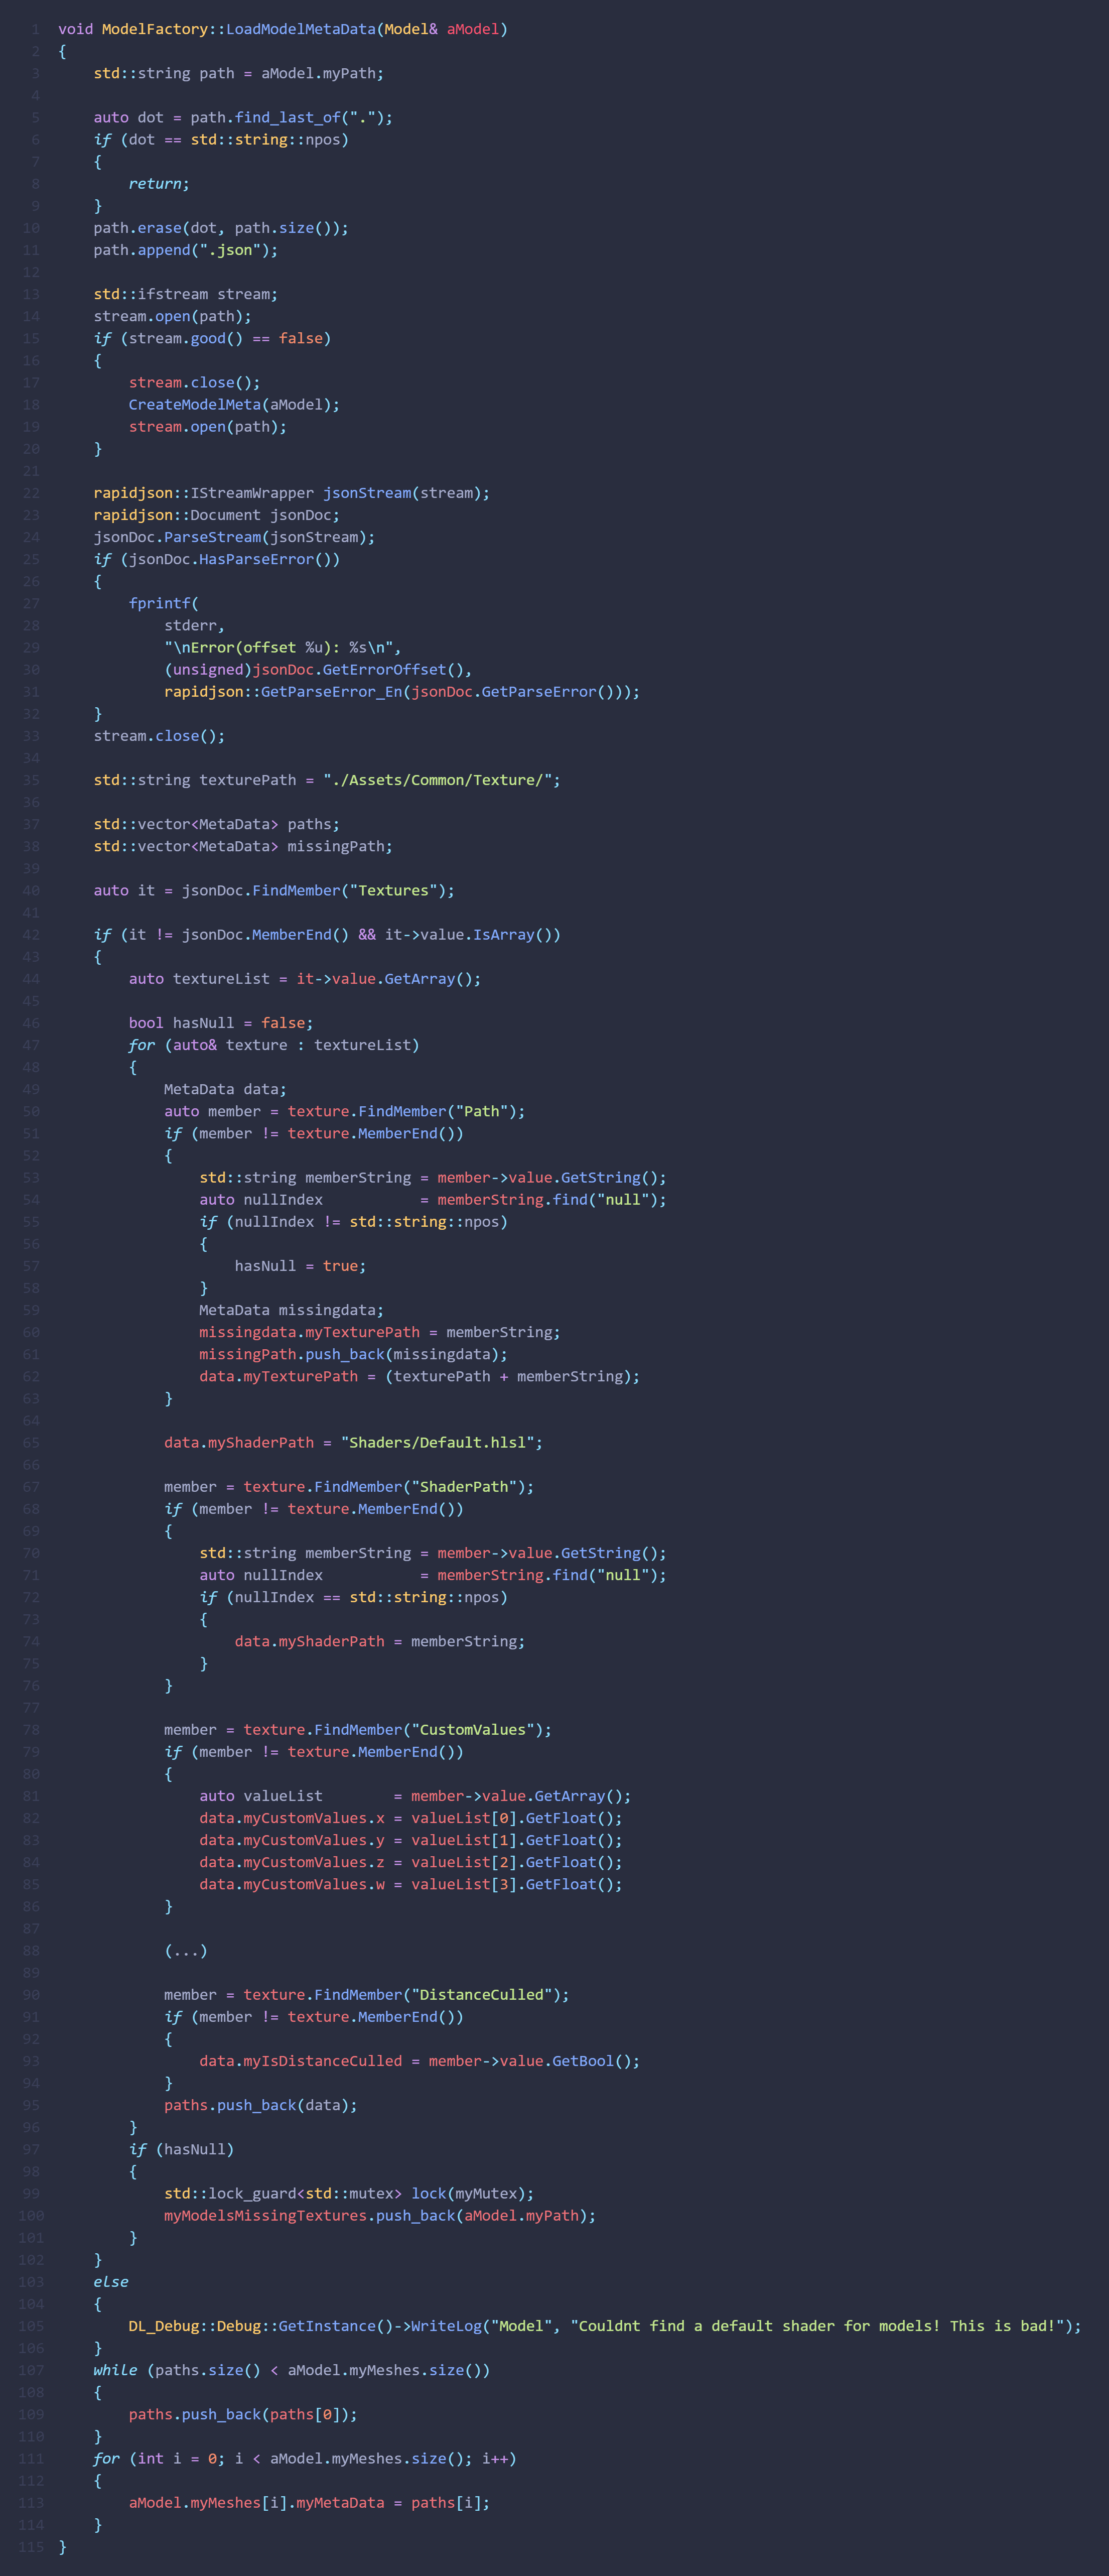
MetaData and Mesh
The model below is stored in the model factory and is parent to the meshes that make up its geometry. All this data is stored by mesh.
// TODO: Click on image to look closer
Render Commands
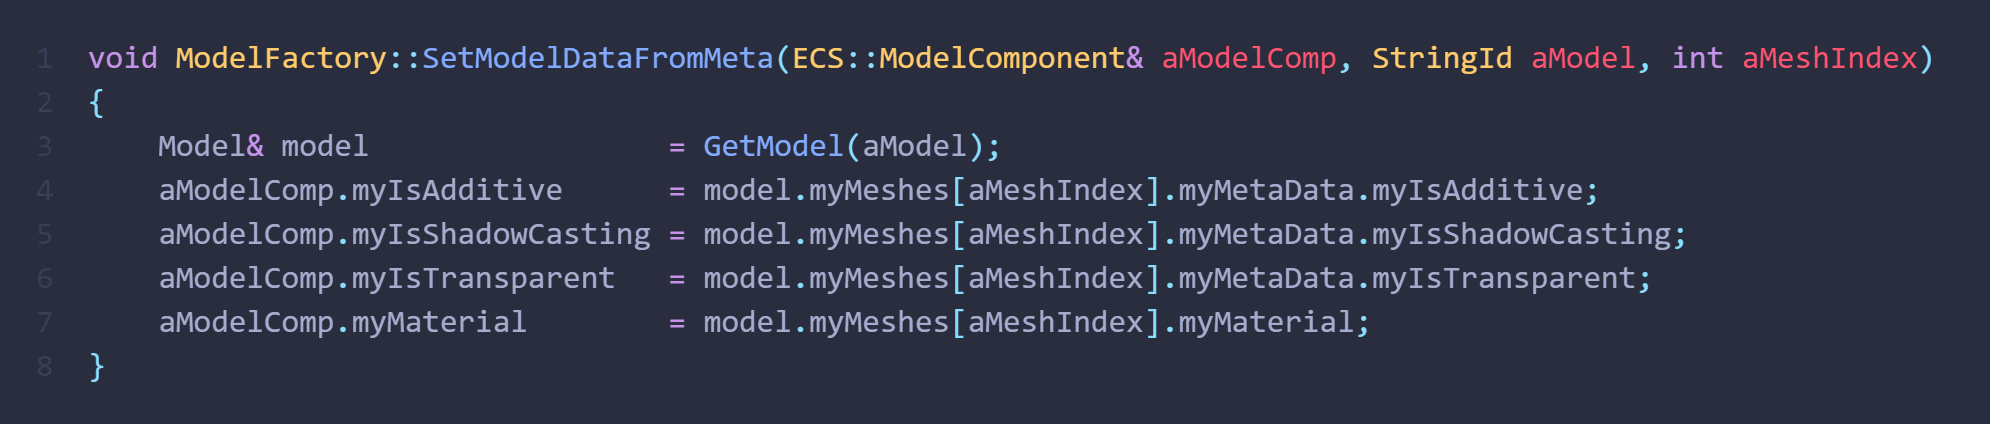
When a mesh is rendered its model’s string id is used to pull the correct model. Then, using the mesh index material specific data loaded from the meta file can be accessed.
If the model is loaded from prefab the object might hold a Custom Component. Using the egg id, i.e. the object id this can be looked up and special render settings will be used for that model. This is used for shaders that need set data per object, like properties in Unity. This forces the model to be rendered using our forward renderer.
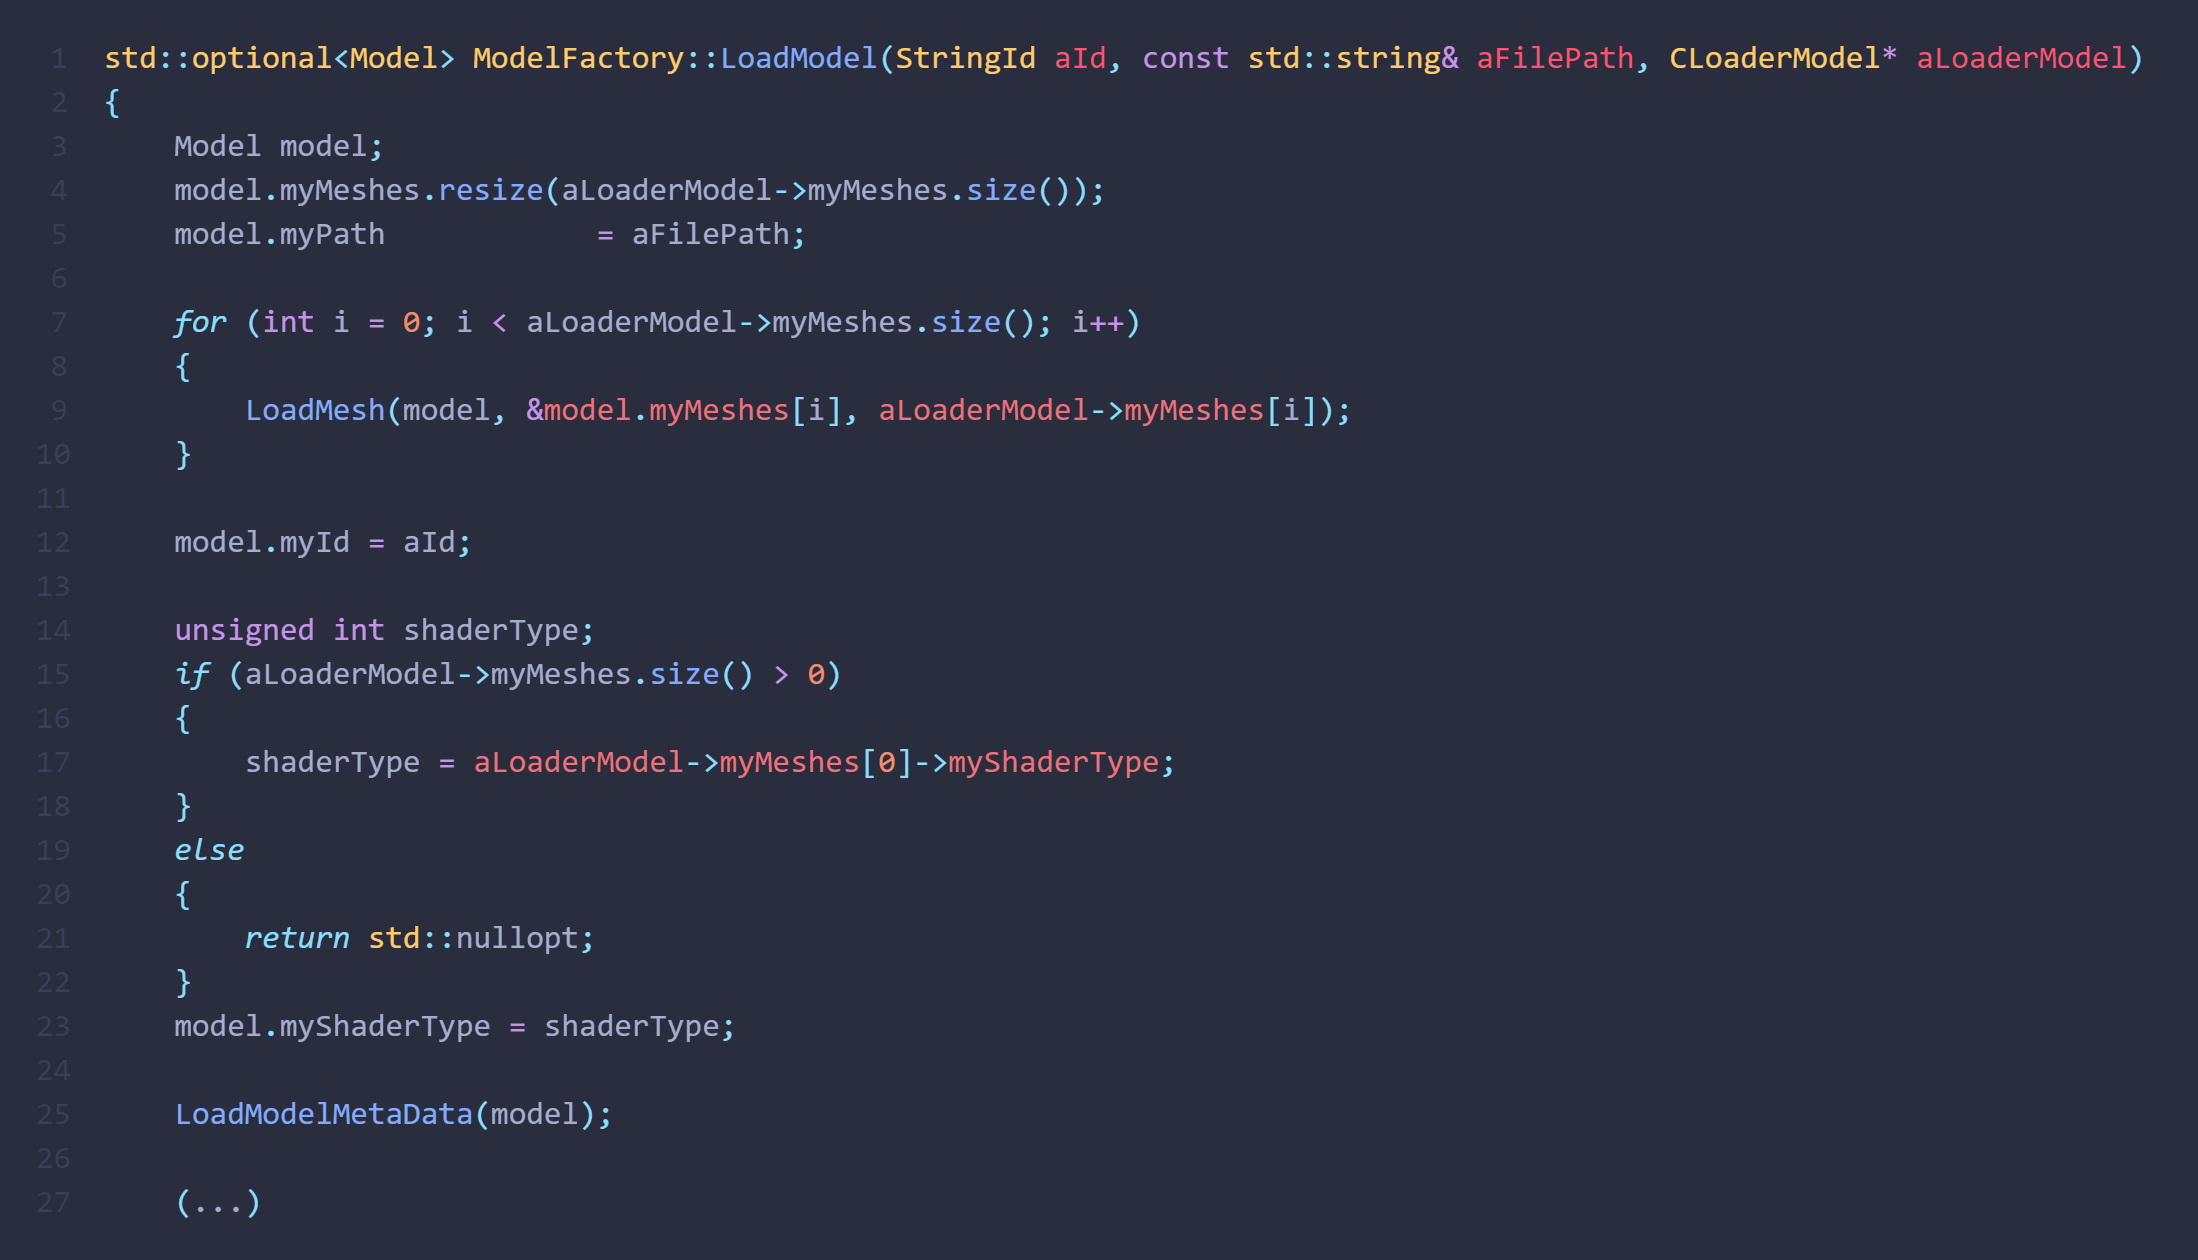
Loading the Model
All models are loaded using our thread pool and swapped out from our null object upon completion.
An override for the load function is called in which the meta data is loaded so that the correct textures and shaders can be set.
Setting the Model
File Example
What I learned
Programming is not only about problem solving but also about diving into the unknown. Taking on a task you are not comfortable requires that you believe in yourself which might sound a bit cheesy! For this project I was very open with the team that I wanted to take on harder challenges and for them to set their expectations accordingly. I am very thankful that I did this. It was a good way for me to prove to myself that I had learned a lot from TGA which gave me a huge confidence boost and a mindset that I keep to this day. Having worked more in Unity since this project I look back with lots of things that I would like to change. Now that I have worked with shaders I understand that this workflow wasn’t optimal. But I am still proud of my accomplishments and it will forever be a milestone for me.